Write yourself a Telegram bookstore bot in Haskell
Intro
Recently Telegram rolled out their new update for Telegram Bot API that introduced payments. So now developers can build merchant bots. In this tutorial, we are going to create a simple bookstore bot that will sell these wonderful O’RLY books that teach as how to build better software. We will go through the process of making a new bot from scratch, creating and debugging webhook, extending it to list books and conduct payments using test payments provider. And all of that in Haskell!
Note: You won’t find here the detailed explanation of different Haskell features like monad transformers, natural transformation, etc. It would make this tutorial unneccessary bigger and there are much better explanations on the Internet. I will try to provide some useful links you can use to understand better what’s going on.
I’m going to use haskell-telegram-api, Telegram Bot API bindings based on Servant library and Servant library itself to create a webhook for our bot. Webhook based implementation makes our bot more responsive in comparison with polling based model but would require our bot to be accessible by Telegram servers on the Internet. It makes it harder to develop and debug your bot, but we will solve this issue using ngrok. You can read more about receiveing updates from Telegram here. In this tutorial, Telegram will call the webhook to notify our bot of user’s actions and the bot will react on them.
There are two ways to interact with the Telegram servers when the webhook is called. You can directly answer Telegram’s webhook requests with an appropriate response to user action like send him a message. But in this case you won’t be able to know was your response successfully accepted by Telegram or not. Another option is to call Telegram directly when bot received a webhook request. See more info here and here for visual representation.
We are going to use the later one because it makes it simpler and at the moment telegram-api library gives us only this option.
Step 0: Prerequisites
In order to start we need to
1) register our bot with @BotFather and receive bot token. Keep it secret! See more information about registering your bot on official Telegram page.
2) obtain test payment token from @BotFather. Keep it secret too!
3) install ngrok or any other simial tool.
I assume you already have stack and some Haskell IDE installed.
Step 1: Initialize project
Stack provides us with the possibility to create a new project from a template and there is already servant template suitable for our needs.
We will create a new bot project with the name orly-bookstore-bot from the servant template by running command:
stack orly-bookstore-bot servant
Explore newly created folder a bit to see what was created from template and add these dependencies to orly-bookstore-bot.cabal file into library.build-depends section.
library
  build-depends:
                     # other dependencies
                     , mtl
                     , http-client
                     , http-client-tls
                     , telegram-api >= 0.6.3.0
                     , text
                     , transformers
telegram-api should be no less than version 0.6.3.0 because payments API has been added in this version.
Now you can open src/Libs.hs file, remove everything that is below imports except startApp function since it is exported.
We will redefine app function which is used for the unit tests in this template, but I will skip testing aspect in this blog post.
You can take a look at test/Spec.hs to get more context on how to test your bot.
But comment out it for now.
Add these imports to the src/Libs.hs file:
import           GHC.Generics
import           Control.Monad.Reader
import           Control.Monad.Except
import           Data.Text (Text)
import qualified Data.Text as T
import           Network.HTTP.Client (Manager)
import           Network.HTTP.Client.TLS  (tlsManagerSettings)
import           Data.Maybe
import           Data.Monoid
import           Web.Telegram.API.Bot
import           System.Environment
import qualified Paths_orly_bookstore_bot (version) as P
import           Data.Version (showVersion)
Same for the language extensions. These are very useful ones:
{-# LANGUAGE DeriveGeneric              #-}
{-# LANGUAGE OverloadedStrings          #-}
{-# LANGUAGE GeneralizedNewtypeDeriving #-}
{-# LANGUAGE DeriveFunctor              #-}
{-# LANGUAGE ViewPatterns               #-}
{-# LANGUAGE RecordWildCards            #-}
Some of the imports and extentions are not needed at the moment, but we will need them later.
Step 1: Create version resource with Servant
As the first step, I’d like to focus on Servant and create simple version resource to make you familiar with Servant library. If you already know it you can skip this step and go to the Step 2.
The main idea of Servant is that your Web API can be defined and described entirely by its type. It brings you a lot of useful features, compile time check for API documentation, client generation and so on, but I’d refer you to Servant documentation to get more information on that. We are going to define this type for version page to start with and later extend it with webhook resource.
Final src/Lib.hs should look like:
-- We needed some of those language extensions to make it that simple
data Version = Version
  { version :: Text
  } deriving (Show, Generic)

instance ToJSON Version

-- At the moment Bot API consists of only version resource
-- that returns Version data record as a JSON.
-- Thanks to Generic and ToJSON instance Servant knows how
type BotAPI = "version" :> Get '[JSON] Version

botApi :: Proxy BotAPI
botApi = Proxy

startApp :: IO ()
startApp = do
  putStrLn "ORLY book store bot is starting..."
  run 8080 app

app :: Application
app = serve botApi botServer

-- actual server implementation
botServer :: Server BotAPI
botServer = returnVersion
    where version' = Version $ pack $ showVersion P.version
          returnVersion = return version'
Important: You have to add Path_orly_bookstore_bot to the list of exposed or other modules in your cabal file!
Otherwise, it won’t compile with very undescriptive message.
Run stack build. It should pull all dependencies and compile.
Now you can run your bot with:
$ stack exec orly-bookstore-bot-exe
ORLY book store bot is starting...
and see the result with:
$ curl http://localhost:8080/version
{"version":"0.1.0.0"}
Step 2: Create Bot monad transformer and configuration
Strictly speaking part of this step is not required and a bit advanced for basic bot implementation.
We are going to create a Bot monad only to improve the way we read configuration and reduce the amount of boilerplate code,
but for the sake of simplicity, you can pass configuration parameter manually.
Let’s define Bot monad transformer stack:
newtype Bot a = Bot
    { runBot :: ReaderT BotConfig Handler a
    } deriving ( Functor, Applicative, Monad, MonadIO
                 MonadReader BotConfig, MonadError ServantErr)
where Handler is Servant’s Handler which is nothing more than just a type alias for ExceptT ServantError IO.
The Bot type is accompanied by the classic set of deriving instances (don’t forget to put GeneralizedNewtypeDeriving language extension on the top of the file).
You can read more about monad transformers on wiki books, about deriving mtl typeclasses here, and more about ReaderT here.
There is very nice blog post that shows how to build web application with Servant.
BotConfig is a read-only configuration that will be used by the bot.
It is a data record that we will build on application start up.
data BotConfig = BotConfig
  { telegramToken :: Token
  , paymentsToken :: Text
  , manager :: Manager
  }
In order to initialize our bot with configuration, let’s change startApp and app functions.
We will read bot settings from environment variables using getEnvironment function from System.Environment module,
build BotConfig and initialize our bot with it.
startApp :: IO ()
startApp = do
  putStrLn "ORLY book store bot is starting..."
  env <- getEnvironment
  manager' <- newManager tlsManagerSettings
  let telegramToken' = fromJust $ lookup "TELEGRAM_TOKEN" env
      paymentsToken' = fromJust $ lookup "PAYMENTS_TOKEN" env
      config = BotConfig
        { telegramToken = Token $ T.pack $ "bot" <> telegramToken'
        , paymentsToken = T.pack paymentsToken'
        , manager = manager'
        }
  run 8080 $ app config

app :: BotConfig -> Application
app config = serve botApi $ initBotServer config
Now we need to change our botServer function signature to return ServerT BotAPI Bot because we want to work with Bot monad and implement an initBotServer function that will do natural transformation from our Bot monad to to Servant’s ExceptT ServantErr IO and initialize server.
botServer :: ServerT BotAPI Bot
botServer = returnVersion
    where version' = Version $ pack $ showVersion P.version
          returnVersion :: Bot Version
          returnVersion = return version'

initBotServer :: BotConfig -> Server BotAPI
initBotServer config = enter (transform config) botServer
    where transform :: BotConfig -> Bot :~> ExceptT ServantErr IO
          transform config = Nat (flip runReaderT config . runBot)
Compile and run. At that point, your bot should be returning version page as before.
Note that even though we used unsafe functions fromJust to get tokens our application is working fine.
Haskell is really lazy and it saves our application from crashing on startup.
Step 3: Add webhook
It’s time to create a webhook for our bot!
At first, we will extend BotAPI type to have webhook resource defined there.
For the webhook we need to make sure that our bot accepts request only from Telegram’s servers.
So as it’s suggested in their documentation it’s fine to use bot’s token itself as the path parameter.
They will send POST request with Update object (from telegram-api) to the webhook and we will validate secret token in the path parameter to authorize Telegram.
If validation was successful our bot will handle Update message.
Servant library provides us Capture combinator that we will use to read the secret token from the path parameter.
The final version of the BotAPI looks like this:
type BotAPI = "version" :> Get '[JSON] Version
         :<|> "webhook" -- maps to /webhook/<secret_token>
              :> Capture "secret" Text
              :> ReqBody '[JSON] Update
              :> Post '[JSON] ()
And we have to change botServer function again to add a handler for the webhook.
Our bot will not compile before we do that.
Type safety! We are going to use the same wiered operator :<|> here that we used to add the webhook to BotAPI.
botServer :: ServerT BotAPI Bot
botServer = returnVersion :<|> handleWebhook
    where version' = Version $ T.pack $ showVersion P.version
          returnVersion :: Bot Version
          returnVersion = return version'
          handleWebhook :: Text -> Update -> Bot ()
          handleWebhook secret update = do
              Token token <- asks telegramToken
              if EQ == compare secret token
                 then handleUpdate update
                 else throwError err403

handleUpdate :: Update -> Bot ()
handleUpdate update = do
    case update of
--      Update { ... } more cases will go here
        _ -> liftIO $ putStrLn $ "Handle update failed. " ++ show update
Compile and run your bot with stack. It’s time to test it.
Step 4: Test your bot with ngrok
In order to test the bot from our local machine, we would need some tunnel to make our bot that is running locally accessible from the Internet. Personally, I use ngrok. It’s free for 30 requests per minute, easy to use and records interaction with your endpoint. But you can use anyone you like.
So our bot is running, start ngrok with the command:
ngrok http 8080
Now you can see HTTP and HTTPS URLs that ngrok assigned to us and all requests that go to these URLs will appear here.
You can also open http://localhost:4040 and see full information about requests and responses with their headers, bodies, and ability to replay them again to test you server.
We need to use HTTPS URL for our webhook. Copy it and run the curl command similar to what you see below:
curl "https://api.telegram.org/bot$TELEGRAM_TOKEN/setWebhook?url=https://<ngrok_id_here>.ngrok.io/webhook/bot$TELEGRAM_TOKEN"
Now you can go to Telegram client and send any message you want to your bot. The bot will print it to output and you can see it in your terminal window, but won’t respond to the client.
Step 5: First interaction (help command)
Our bot does not do much at the moment.
It does not even send any messages yet to the client.
It’s time to change it.
Define help message request and go to the handleUpdate function.
helpMessage userId = sendMessageRequest userId $ T.unlines
    [ "/help - show this message"
    , "/books - show list of all books"
    , "/find title - find book by title"
    ]

handleUpdate :: Update -> Bot ()
handleUpdate update = do
    case update of
        Update { message = Just msg } -> handleMessage msg
        _ -> liftIO $ putStrLn $ "Handle update failed. " ++ show update

handleMessage :: Message -> Bot ()
handleMessage msg = do
    BotConfig{..} <- ask
    let chatId = ChatId $ fromIntegral $ user_id $ fromJust $ from msg
        messageText = text msg
        sendHelpMessage = sendMessageM (helpMessage chatId) >> return ()
        onCommand (Just (T.stripPrefix "/help" -> Just _)) = sendHelpMessage
        onCommand _ = sendHelpMessage
    liftIO $ runClient (onCommand messageText) telegramToken manager
    return ()
handleUpdate uses pattern matching to match on Update object when handleMessage, in turn, matches on message content. You can see trick with pattern matching on text prefix in the implementation of the onCommand function: (Just (T.stripPrefix "/command" -> Just args)) = ....
onCommand returns operations that runClient will execute, so now we can extend list of supported commands by defining new patterns.
Step 6: List books and send invoices
Finally we came to the point when we will send books to the users with special button to pay for them.
Define the list of books with prices:
allBooks :: [(Text, (Text, Text, Int))]
allBooks =
  [ ("Copying and Pasting from Stack Overflow",
        ("http://i.imgur.com/fawRchq.jpg", "Cutting corners to meet arbitrary management deadlines", 7000))
  , ("Googling the Error Message",
        ("http://i.imgur.com/fhgzVEt.jpg", "The internet will make those bad words go away", 4500))
  , ("Whiteboard Interviews",
        ("http://i.imgur.com/oM9yCym.png", "Putting the candidate through the same bullshit you went through", 3200))
  ]
Now we need to add a function to build invoice messages from books data using sendInvoiceRequest function.
It’s the function from Telegram API library that creates invoice request with default parameters for optional fields, but you can easily set these fields like snd_inv_photo_url in example below.
buildBuyBookInvoice (ChatId chatId) token (title, (image, description, price)) =
    (sendInvoiceRequest chatId title description payload token link code prices)
        { snd_inv_photo_url = Just image }
        where code = CurrencyCode "USD"
              payload = "book_payment_payload"
              link = "deep_link"
              prices = [ LabeledPrice title price
                       , LabeledPrice "Donation to a kitten hospital" 300
                       , LabeledPrice "Discount for donation" (-300) ]
The last change is to extend handleMessage function.
For demonstration purposes, we will add new commands to list all books with /books command and /find <book_name_part> to find books by title.
To build invoice messages we would need to map with buildBuyBookInvoice function over the books we want to send to the user.
Then we will mapM_ with sendInvoiceM function over invoice requests we created before and let runClient send them eventually to the end user.
sendInvoices books = mapM_ sendInvoiceM $ map (buildBuyBookInvoice chatId paymentsToken) books
byTitle title book = T.isInfixOf title $ fst book
onCommand (Just (T.stripPrefix "/help" -> Just _)) = sendHelpMessage
onCommand (Just (T.stripPrefix "/books" -> Just _)) = sendInvoices allBooks
onCommand (Just (T.stripPrefix "/find " -> Just title)) = sendInvoices $ filter (byTitle title) allBooks
Build and run it now, check that ngrok is still running.
If not, start it and update your webhook URL.
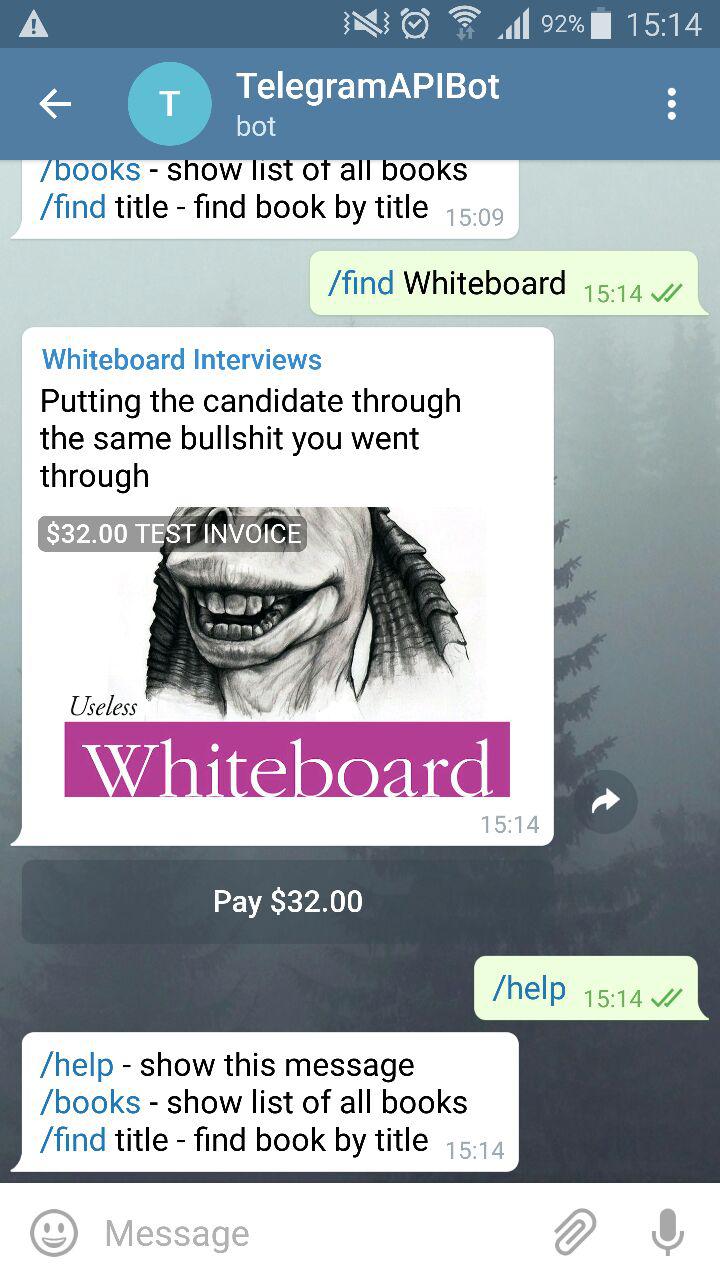
Open your Telegram client and type /books in your bot’s chat.
Your bot should send you messages with Pay button with the price on it for every book.
You should see something like this.

And like this if you send /find Whiteboard and /help or any other unrecognized message to the bot.
Step 7: Accept payments
Step by step process to send invoices and confirm payment is described in details on official Telegram documentation page.
We are not going to add shipping related funcitonality, but we do need to extend our bot to compete payments.
In order to do so we will extend handleUpdate function to handle different type of Updates.
Telegram will send us pre_checkout_query and our bot must reply with answerPrecheckoutQueryM within 10 seconds.
If everything is OK, Telegram will call webhook with an update containing Message with successful_payment to confirm payment and complete transaction.
So we need handlePreCheckout function to answer pre checkout query from Telegram:
handlePreCheckout :: PreCheckoutQuery -> Bot ()
handlePreCheckout query = do
    BotConfig{..} <- ask
    let chatId = ChatId $ fromIntegral $ user_id $ pre_che_from query
        queryId = pre_che_id query
        okRequest = AnswerPreCheckoutQueryRequest queryId True Nothing
    liftIO $ runClient (answerPreCheckoutQueryM okRequest) telegramToken manager
    return ()
And handleSucccessfulPayment function where we will “trigger” shipment of the book to the client.
handleSuccessfulPayment :: SuccessfulPayment -> Bot ()
handleSuccessfulPayment payment = do
    let totalAmount = T.pack $ show $ (suc_pmnt_total_amount payment) `div` 100
        CurrencyCode code = suc_pmnt_currency payment
    liftIO $ print $ "We have earned " <> code <> totalAmount <> ". Shipping book to the client!"
    return ()
And last step is to extend handleUpdate to use these functions.
handleUpdate update = do
    case update of
        Update { message = Just Message
          { successful_payment = Just payment } } -> handleSuccessfulPayment payment
        Update { pre_checkout_query = Just query } -> handlePreCheckout query
        -- the rest of the method
Build and run. Now our bot can do payments!
Try to buy any book from our bot. After going through all steps
using test credit card 4242 4242 4242 4242 with arbitrary CVV
you should see something like this:
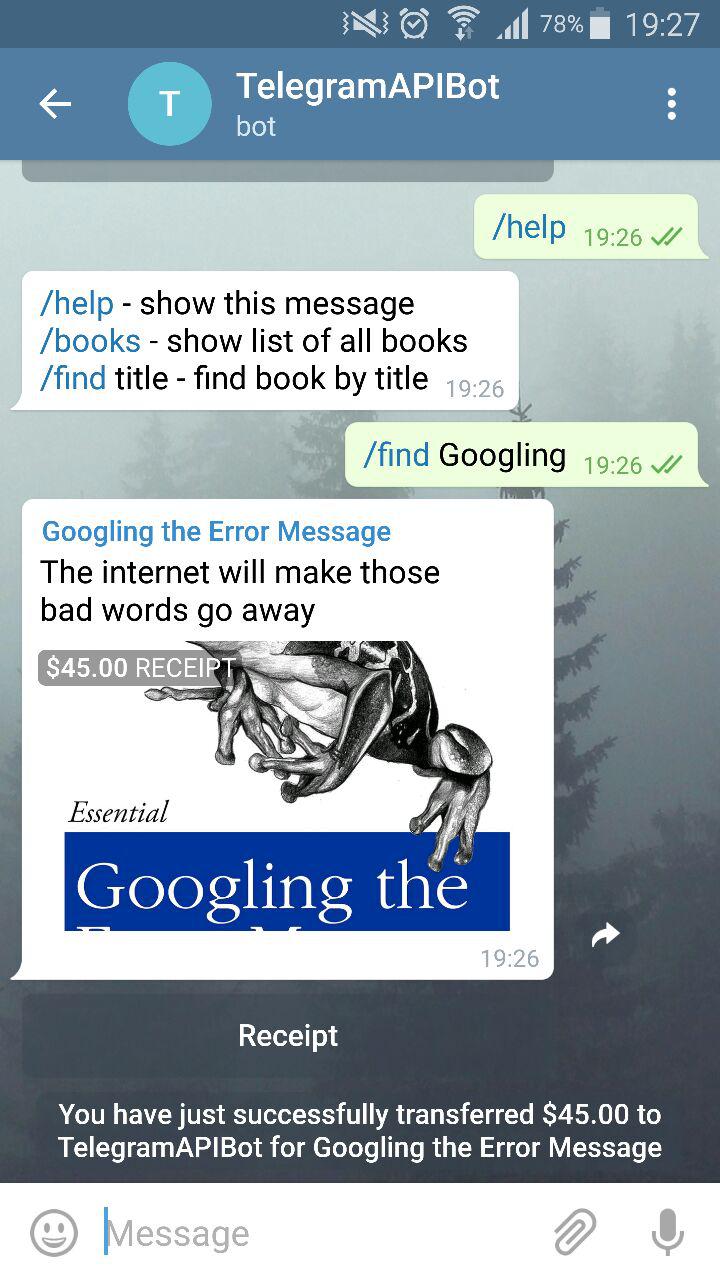
The bot will print the following message to the output:
ORLY book store bot is starting...
"We have earned USD45. Shipping book to the client!"
Conclusions
We went through the several steps in this tutorial,
started with the simple web application based on Servant that returns only its version,
added webhook that the Telegram servers will use to send updates to our bot,
added handlers for different types of commands our bot can understand,
such as /help, /books, /find title,
and added support for payment mechanism to allow users to buy books.
Now you can extend your bot, add new features like inline mode, change text commands to buttons, add automatic webhook configuration on startup, and so on. Almost every feature of Telegram Bot API is suported by haskell-telegram-api.
You can take a look at the complete source code of the bot on Github and implement your own.
blog comments powered by Disqus_1477.png)